반응형
출처 : http://ojtiger.com/179
브라우저가 HTML파일을 읽어오는 순서

반응형

출처 : http://ojtiger.com/179
브라우저가 HTML파일을 읽어오는 순서
<script type="text/javascript">
...
jQuery.fn.center = function () {
this.css("position","absolute");
this.css("top", Math.max(0, (($(window).height() - $(this).outerHeight()) / 2) + $(window).scrollTop()) + "px");
this.css("left", Math.max(0, (($(window).width() - $(this).outerWidth()) / 2) + $(window).scrollLeft()) + "px");
return this;
}
...
showPopup = function() {
$("#popLayer").show();
$("#popLayer").center();
}
</script>
<body>
...
<a href="javascript:;" onclick="javascript:showPopup()">팝업띄우기</a>
...
</body>
<div id="popLayer" style="display:none;">
<div>팝업 레이어입니다.</div>
<div>
코드 출처 : http://stackoverflow.com/questions/210717/using-jquery-to-center-a-div-on-the-screen
출처 : http://ooz.co.kr/78
출처 : http://egloos.zum.com/tiger5net/v/5667935
JQuery에 다른 기능을 검색하다가 아래의 사이트를 발견하여 나중에 도움이 될 듯하여 정리해둔다.
1. jQuery로 선택된 값 읽기
$("#selectBox option:selected").val();
$("select[name=name]").val();
2. jQuery로 선택된 내용 읽기
$("#selectBox option:selected").text();
3. 선택된 위치
var index = $("#test option").index($("#test option:selected"));
4. Add options to the end of a select
$("#selectBox").append("<option value='1'>Apples</option>");
$("#selectBox").append("<option value='2'>After Apples</option>");
5. Add options to the start of a select
$("#selectBox").prepend("<option value='0'>Before Apples</option>");
6. Replace all the options with new options
$("#selectBox").html("<option value='1'>Some oranges</option><option value='2'>MoreOranges</option>");
7. Replace items at a certain index
$("#selectBox option:eq(1)").replaceWith("<option value='2'>Someapples</option>");
$("#selectBox option:eq(2)").replaceWith("<option value='3'>Somebananas</option>");
8. 지정된 index값으로 select 하기
$("#selectBox option:eq(2)").attr("selected", "selected");
9. text 값으로 select 하기
$("#selectBox").val("Someoranges").attr("selected", "selected");
10. value값으로 select 하기
$("#selectBox").val("2");
11. 지정된 인덱스값의 item 삭제
$("#selectBox option:eq(0)").remove();
12. 첫번째 item 삭제
$("#selectBox option:first").remove();
13. 마지막 item 삭제
$("#selectBox option:last").remove();
14. 선택된 옵션의 text 구하기
alert(!$("#selectBox option:selected").text());
15. 선택된 옵션의 value 구하기
alert(!$("#selectBox option:selected").val());
16. 선택된 옵션 index 구하기
alert(!$("#selectBox option").index($("#selectBox option:selected")));
17. SelecBox 아이템 갯수 구하기
alert(!$("#selectBox option").size());
18. 선택된 옵션 앞의 아이템 갯수
alert(!$("#selectBox option:selected").prevAl!l().size());
19. 선택된 옵션 후의 아이템 갯수
alert(!$("#selectBox option:selected").nextAll().size());
20. Insert an item in after a particular position
$("#selectBox option:eq(0)").after("<option value='4'>Somepears</option>");
21. Insert an item in before a particular position
$("#selectBox option:eq(3)").before("<option value='5'>Someapricots</option>");
22. Getting values when item is selected
$("#selectBox").change(function(){
alert(!$(this).val());
alert(!$(this).children("option:selected").text());
});
출처 : http://blog.daum.net/twinsnow/124
http://cflove.org/2010/05/simple-jquery-textarea-maxlength-function.cfm 참조
|
<script type='text/javascript' src='http://cflove.org/js/jquery-1.4.2.min.js'></script> $("document").ready(function() { </script>
<textarea maxlength="50" style="width:400px; height:50px"></textarea>
[출처] textarea maxlength 제한하기|작성자 koalagon
|
[참고] 관련 포스트
[jQuery Plugin] jQuery Multiple File Upload Plugin - 멀티 파일 업로드 (jQuery MultiFile v2.0.3)
[jsp/servlet] commons-fileupload 를 이용한 파일업로드 (서블릿)
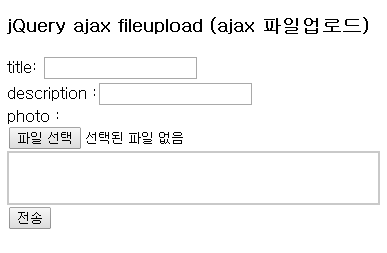
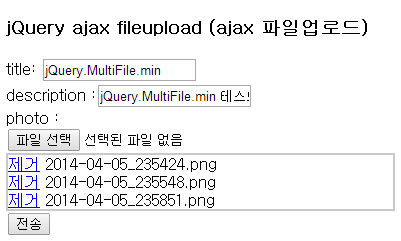
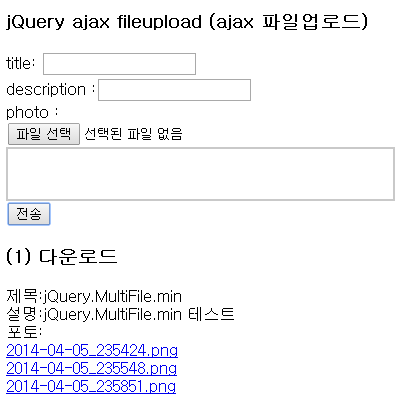
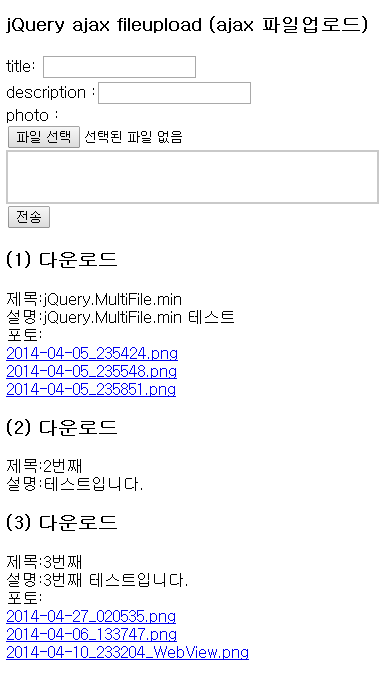
[jQuery Plugin/ajax] jQuery Form Plugin 이용한 ajax 파일 업로드 [서버사이드: Servlet (commons-fileupload API)]
jQuery Multiple File Upload Plugin Site :
jQuery MultiFile v2.0.3 : http://www.fyneworks.com/jquery/multifile/
jQuery Multiple File Upload Plugin v1.48 : http://www.fyneworks.com/jquery/multiple-file-upload/
서버사이드 작업은 여기서 생략하도록 하겠습니다.
기존 포스트 및 첨부된 프로젝트 소스를 참고하세요!
|
[코드] multifileExam01.html | ||
| ||
|
|
Ajax
jQuery Form Plugin 을 사용해서 비동기방식(Ajax)으로 업로드한후 file input컨트롤을 리셋 하는 방법!?
To reset the file selections, just make the following call:
|
$('input:file').MultiFile('reset') |
[기타 잡담]
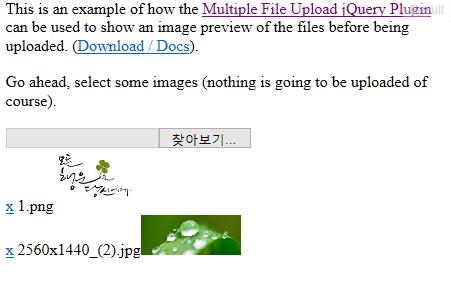
Multiple File Upload jQuery Plugin 2.1.0 버전부터는 이미지파일을 업로드 추가했을경우 이미지 미리보기를 지원하는것 같다.
예제: http://jsfiddle.net/fyneworks/2LLws/
Multiple File Upload jQuery Plugin 2.1.0 버전 : https://rawgit.com/fyneworks/multifile/2.1.0-preview/jquery.MultiFile.js
|
<input type="file" class="multi with-preview" multiple /> |
출처 : http://api.jqueryui.com/accordion/
제가 쓴건...
$(function () {
$("#accordion").accordion({collapsible:true});
$("#accordion").accordion("option", "animate", 100);
});
요거...
아래는 api 내용..ㅎㅎ
Description: Convert a pair of headers and content panels into an accordion.
The markup of your accordion container needs pairs of headers and content panels:
1 2 3 4 5 6 |
|
Accordions support arbitrary markup, but each content panel must always be the next sibling after its associated header. See the header option for information on how to use custom markup structures.
The panels can be activated programmatically by setting the active option.
When focus is on a header, the following key commands are available:
When focus is in a panel:
The accordion widget uses the jQuery UI CSS framework to style its look and feel. If accordion specific styling is needed, the following CSS class names can be used:
ui-accordion: The outer container of the accordion.ui-accordion-header: The headers of the accordion. The headers will additionally have a ui-accordion-icons class if they contain icons.ui-accordion-content: The content panels of the accordion.animate option)0active to false will collapse all panels. This requires the collapsible option to be true.Initialize the accordion with the active option specified:
1 |
|
Get or set the active option, after initialization:
1 2 3 4 5 |
|
{}false will disable animations.easing and duration properties.down property with any of the above options.Initialize the accordion with the animate option specified:
1 |
|
Get or set the animate option, after initialization:
1 2 3 4 5 |
|
falseInitialize the accordion with the collapsible option specified:
1 |
|
Get or set the collapsible option, after initialization:
1 2 3 4 5 |
|
falsetrue.Initialize the accordion with the disabled option specified:
1 |
|
Get or set the disabled option, after initialization:
1 2 3 4 5 |
|
"click"Initialize the accordion with the event option specified:
1 |
|
Get or set the event option, after initialization:
1 2 3 4 5 |
|
"> li > :first-child,> :not(li):even"Selector for the header element, applied via .find() on the main accordion element. Content panels must be the sibling immediately after their associated headers.
Initialize the accordion with the header option specified:
1 |
|
Get or set the header option, after initialization:
1 2 3 4 5 |
|
"auto"Controls the height of the accordion and each panel. Possible values:
"auto": All panels will be set to the height of the tallest panel."fill": Expand to the available height based on the accordion's parent height."content": Each panel will be only as tall as its content.Initialize the accordion with the heightStyle option specified:
1 |
|
Get or set the heightStyle option, after initialization:
1 2 3 4 5 |
|
{ "header": "ui-icon-triangle-1-e", "activeHeader": "ui-icon-triangle-1-s" }Icons to use for headers, matching an icon provided by the jQuery UI CSS Framework. Set to false to have no icons displayed.
Initialize the accordion with the icons option specified:
1 |
|
Get or set the icons option, after initialization:
1 2 3 4 5 |
|
Invoke the destroy method:
1 |
|
Invoke the disable method:
1 |
|
Invoke the enable method:
1 |
|
optionName.Invoke the method:
1 |
|
Invoke the method:
1 |
|
optionName.Invoke the method:
1 |
|
Invoke the method:
1 |
|
heightStyle option.Invoke the refresh method:
1 |
|
jQuery object containing the accordion.Invoke the widget method:
1 |
|
accordionactivateTriggered after a panel has been activated (after animation completes). If the accordion was previously collapsed, ui.oldHeader and ui.oldPanel will be empty jQuery objects. If the accordion is collapsing, ui.newHeader and ui.newPanel will be empty jQuery objects.
activate event is only fired on panel activation, it is not fired for the initial panel when the accordion widget is created. If you need a hook for widget creation use the create event.Initialize the accordion with the activate callback specified:
1 2 3 |
|
Bind an event listener to the accordionactivate event:
1 |
|
accordionbeforeactivateui.oldHeader and ui.oldPanel will be empty jQuery objects. If the accordion is collapsing, ui.newHeader and ui.newPanel will be empty jQuery objects.Initialize the accordion with the beforeActivate callback specified:
1 2 3 |
|
Bind an event listener to the accordionbeforeactivate event:
1 |
|
accordioncreateui.header and ui.panel will be empty jQuery objects.Initialize the accordion with the create callback specified:
1 2 3 |
|
Bind an event listener to the accordioncreate event:
1 |
|
1 2 3 4 5 6 7 8 9 10 11 12 13 14 15 16 17 18 19 20 21 22 23 24 25 26 27 28 29 30 31 32 33 34 35 36 37 38 39 40 41 42 43 |
|
//부모창의 필드값 갖고 오기
|
1. 일반적인 방법 var parentValue = opener.document.getElementById("parentId").value;
2. jQuery를 이용한 방법 $("#parentId", opener.document).val();
3. find를 이용한 방법 $(opener.document).find("#parentId").val(); |
//동적으로 생성한 폼을 부모창에 붙이기
|
1. jQuery를 이용한 방법 $(opener.document).find("#parentId").append(html); |
//팝업창에서 부모창 함수 호출
|
1-1. 일반적인 방법 opener.location.href = "javascript:부모스크립트 함수명();";
1-2. 일반적인 방법 window.opener.fnCall();
2. jQuery를 이용한 방법 $(opener.location).attr("href", "javascript:부모스크립트 함수명();"); |
//팝업창에서 부모창으로 값 넘기기
|
1-1. 일반적인 방법 window.opener.document.getElementById("parentId").value = "부모창으로 전달할 값";
1-2. 일반적인 방법 window.opener.폼네임.parentInputName.value = value;
2. jQuery를 이용한 방법 $("#parentId", opener.document).val(부모창으로 전달할 값);
3. find를 이용한 방법 $(opener.document).find("#parentId").val(부모창으로 전달할 값); |
//부모창의 CSS 변경
|
1. jQuery를 이용한 방법 $("#parentId", opener.document).css("display", "none"); |
//팝업창 닫기
|
window.self.close(); |
//팝업창 자신 페이지 새로고침
|
document.location.reload(); |
//팝업창에서 부모창 새로고침(새로고침 의사 표현을 묻는 창이 뜸)
|
window.opener.parent.location.reload(); window.opener.document.location.reload();
|
[출처] 【jQuery】팝업창 opener|작성자 너와나